Wednesday, May 28, 2014

Shabby Blue LOVE


In my last post I shared an old beat up hutch that my husband brought home for me - I had this amazing idea for the back panel on the hutch...but my idea didn't work out as planned. The wall paper I had planned to put on well I didn't have enough. Dang it! Hate when that happens.


My husband actually picked out the shabby blue color - I sanded and painted the whole thing in the same color. See how filthy the hutch was?


The detail was amazing - dont'cha think?

 
There were a few small repairs that needed to be made - like fixing one of the drawers because the face had broken off. I also added some new pulls to the smaller drawers
(be ready for photo overload)
 
so here it is finished...
 
It's a very light shabby blue color - I think it looks good and thinking back the paper would have been to busy.

You can see the new pulls on the smaller drawers...vintage metal detailed pulls - they show a little rust on them still...

 
Bottom drawers - using the old hardware

 
Fixed that top left small drawer - using wood glue turned out as good as new. See the drawer below

 
Here is a side view of the spindles - cool right?

 
Here is a close up of the bottom sides of the hutch.

 
I gotta tell you I am loving this piece. A lot. But because I already have a wonderful hutch in my kitchen I can't keep it - all though I think it would make a cool crafting hutch actually {wink wink}
 
If you are interested in owning this hutch just email me at
curdiss2002@yahoo.com I am selling it for 175.00 or best offer.
 
Happy Hump Day!
xo
 
I am also linking up to the parties above.


Thursday, May 8, 2014

A new Project

 
I wanted to share my newest project. My sweet husband brought this home for me about a month ago and its been sitting in the back yard...I wanted to make it amazing and so it sat while I tried to figure out the fun color scheme I wanted to use.
 
Isn't this piece amazing...it needs a little TLC but the lines are cool and there are so many drawers  and a light that comes with it.
 
 
See the sweet details on the sides of the hutch? Awesome-sauce...
I wanted to do this in Coral and gold but I decided to try something different...I had three different cans of Sherwin Williams paint in 3 shades of blue...and see that there back piece well it came off so I was thinking maybe a cool paint treatment or some fun pattern painted on...


Can you see it? Well, I finally decided tonight at 7:25 p.m. that I would start painting and then I had the most brilliant idea...
 
But I'll share that with you tomorrow...Oh you'll love it---I hope!
 
xo
tina

Monday, April 28, 2014

Instant VINTAGE wall ART

I have a problem. I like to change things around in my house regularly and repaint stuff a lot. There I said it - first step to fixing a problem is admitting you have one, right? I don't plan on stopping but I am willing to admit it. Look sometimes you need a quick fix.
 
Sometimes the best way to save money is to use something you already have in a different way! So I went in search of "Schtuff" in my studio and found some vintage embroidery hoops - I love the idea of embroidery and wish I could do it WELL but I have a small gimp in my embroidery hand so I thought about using some fabric or something cool in the hoops...then it hit me...I had some old quilt parts (saving it for something - not sure what) but this must have been it...
 
I cut out some parts and placed them the way I liked them into the embroidery hoops and wham...look what came out
 
 
Just like grandma's house (without the moth ball smell)

 
I tried it with some other hoops I had for my kitchen. - I used some cherry fabric, a part of a vintage tablecloth and then tried my hand at embroidery - I added the heart and some banners and in white - which is barely visible but says Good Morning...again I am glad you cant see it up close because its pretty bad. I did put them up in my kitchen and I LOVE them - so my mission was accomplished.
 
Just look at your fabric stash and re-discover it all and the possibilities are endless and on the cheap!
Instant wall art!
 
I am linking this up to the parties above:
 

Thursday, April 24, 2014

dirty old sheets


Hi - been to any good yard sales lately? I haven't but in the recent past I had and found some fun old vintage sheets - hence the pun (dirty old sheets) they aren't really dirty but they are deliciously old and I seem to be especially attracted to fun bright flowery sheet sets.


 In the past I had planned on making those cute pillow case dresses (remember those?) But my girls are now 14 & 12 - and they ain't having none of that...I don't blame them but how cute would they look in them?


Because most of the sheet sets I find our usually twin (my bed is a king) I can't actually use them so I decided to cut one up and make some fun banners. Instead of the standard pennant style banner I made them in half circles and pinked the edges. I think it came out super cute.


Nice right?
I am linking this up to the parties above and putting in my etsy shop in case you LOVE it too.


Here's to finding new uses for old STUFF. Especially something as pretty as these sheets.
 
Happy Crafting
tina
 

Monday, April 21, 2014

Need a little Wine?

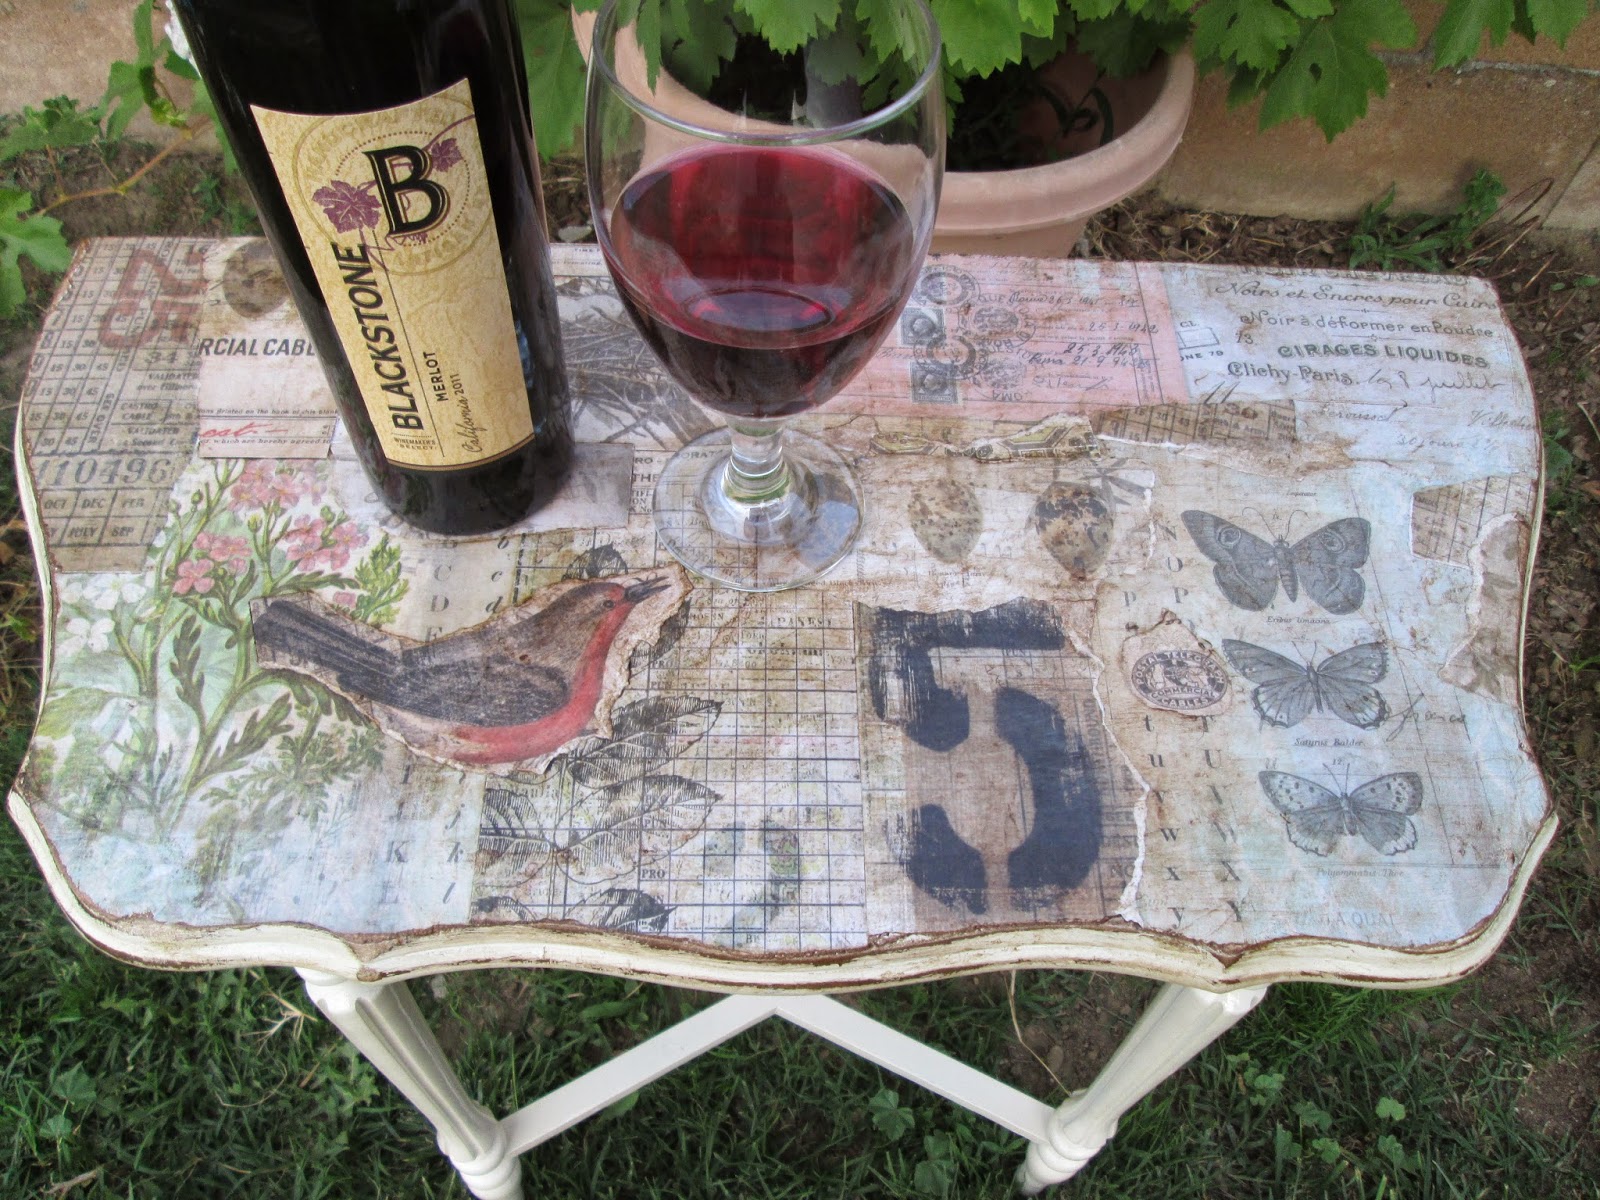
After a long day of work I am sure a nice glass of wine is something you look forward to or  maybe need. Well, have a got the cutest table I just finished to share with you tonight.
 
Here is where it started:
 
 
then I sanded it, painted it cream 


then used some awesome paper from Tim Holtz and collaged the top of the table
sanded it on the edges, waxed it deep brown then sealed it

 
and looky here


how great would this be to come home to after a day at work next to your couch or by the bed...
I am very proud of the way this little vintage table turned out.
 
I am linking this up to the following parties & the parties above:
 
{In case you love it like crazy and have to have it - it's listed in my etsy shop.}
 
xo
tina


Tuesday, April 1, 2014

Vintage Secretary Re-DO

Let me start this by saying that at my last craft show I had this old vintage quilt rack - the kind that stands up, the one that you can hang several blankets on. I had it for a lot of years and decided one day that I would use it as my wrapping station at my shows. It was perfect for hanging my tissue paper for wrapping my products and for hanging my bags over for putting the wrapped products into. It worked like a dream.
 
Then of course my family packs me up at night and once home we noticed that of all the things that made it home my vintage quilt rack/new wrapping station was not one of them. {super sad face inserted here} boy was I mad...so since then I had been on the look out for a quilt rack or something similar...not an easy task...but I did find something like this here...
 
 
Once I found it I knew it had to be painted so I took my go-to color Turquoise and I think I am in LOVE again.


Isn't she pretty???
 
 
Here is how I plan to use it...

 
The top has this small little tray like thingy - that I suppose could hold spare change or loose buttons but I plan on putting my cards in there.

 
see there is a place for the tissue paper and handles for the bags

 
I think it came out wonderfully - not as good as my original quilt rack


Neat-o
 
I love taking something old and turning it into something cool.
 
I am linking this up to the parties above...
 
Happy Making

Wednesday, March 26, 2014

Shabby-ish french Chair

Good Grief - it sure has been a long time. But I am BACK...This year started off in a flurry of things happening and changing. First of all my store - well - it happened that while I thought I had the coolest furniture and the neatest vintage accessories - no one else did. Since I like to keep things real-the first month; I sold a bunch but still not enough to cover the rent. So I sold stuff and then had to pay 60.00 out of pocket to cover the rent...I decided them that I couldn't so that again...I actually liked my stuff and wasn't trying to lighten my load of "STUFF" I was hoping to make money not give stuff away. So we decided to call it quits. I wanted to start the year off MAKING MONEY not losing it - so January was our last month and because I was able to get out early enough and had already paid January rent =  the things I actually did sell I made money! Yeah...so the point of the story is that I closed my shop after 2 months...
 
boohoo but of course being the true hoarder thrifter that I am I haven't stopped looking or seeing furniture that is crying out for help. So here is my newest find. I forgot to take a before photo but here it is finished.

 
Picture this: Brown wood chair with rollers on the legs and filthy worn fabric on the seat and backing.

I had a few burlap coffee bags and decided to use one that had less tears and still looked good. Can you see the correlation?


The seat has the words USDA ORGANIC


The top part has the word FAIRTRADE up at the top - that part was a bit torn and worn so I tried to show as much as possible without losing the integrity of the bag and the word...
I was planning to sell this chair but I think I'm in love with it. I put it in my newly decorated kitchen...
 
I am back and ready to take on some more re purposing projects!
 
I am linking this up to the parties above:
 
Happy Making