Showing posts with label furniture makeover. Show all posts

Tuesday, July 1, 2014

Time for a change

I love to re-decorate and while it gets harder to do in the larger spaces in my home I love to play around with my front porch. I know I have shared it before but recently for the 4th of July - I decided to clean it up...
This is what it looked like before
 
This was a sweet little farm table that I purchased years ago at a flea market. It sits outside and its seen better days so I knew this was the first thing that needed a
"Pick Me Up"
 
 
This is my new door (which I love) and the way the front porch looks from the street.

 
Pretty but needs some "Shooshing"
I used some of this new amazing paint that I bought awhile back and it was the most amazing shade of aqua/turquoise and it when from cute to AAH-MAZING!!!!

 
Here she is all pretty like and on the front porch

 
Here is my happy little farm table all propped up and as you can see I moved some stuff around and got rid of a few things. I drew up some new chalk art on our welcome board - added my sons bike and a some red white and blue accents.


All because this color needed to be used...
 
I just had to post one more photo of this super cute table and chairs. I repainted (spray painted) the small wicker chairs just to spruce them up. All in all I am in LOVE

 
Well I hope you are having fun sprucing up your spaces.
 
I am linking this up to the challenges above.
 
happy Holiday week
 
xo


Wednesday, May 28, 2014

Shabby Blue LOVE


In my last post I shared an old beat up hutch that my husband brought home for me - I had this amazing idea for the back panel on the hutch...but my idea didn't work out as planned. The wall paper I had planned to put on well I didn't have enough. Dang it! Hate when that happens.


My husband actually picked out the shabby blue color - I sanded and painted the whole thing in the same color. See how filthy the hutch was?


The detail was amazing - dont'cha think?

 
There were a few small repairs that needed to be made - like fixing one of the drawers because the face had broken off. I also added some new pulls to the smaller drawers
(be ready for photo overload)
 
so here it is finished...
 
It's a very light shabby blue color - I think it looks good and thinking back the paper would have been to busy.

You can see the new pulls on the smaller drawers...vintage metal detailed pulls - they show a little rust on them still...

 
Bottom drawers - using the old hardware

 
Fixed that top left small drawer - using wood glue turned out as good as new. See the drawer below

 
Here is a side view of the spindles - cool right?

 
Here is a close up of the bottom sides of the hutch.

 
I gotta tell you I am loving this piece. A lot. But because I already have a wonderful hutch in my kitchen I can't keep it - all though I think it would make a cool crafting hutch actually {wink wink}
 
If you are interested in owning this hutch just email me at
curdiss2002@yahoo.com I am selling it for 175.00 or best offer.
 
Happy Hump Day!
xo

 
I am also linking up to the parties above.


Thursday, May 8, 2014

A new Project

 
I wanted to share my newest project. My sweet husband brought this home for me about a month ago and its been sitting in the back yard...I wanted to make it amazing and so it sat while I tried to figure out the fun color scheme I wanted to use.
 
Isn't this piece amazing...it needs a little TLC but the lines are cool and there are so many drawers  and a light that comes with it.
 
 
See the sweet details on the sides of the hutch? Awesome-sauce...
I wanted to do this in Coral and gold but I decided to try something different...I had three different cans of Sherwin Williams paint in 3 shades of blue...and see that there back piece well it came off so I was thinking maybe a cool paint treatment or some fun pattern painted on...


Can you see it? Well, I finally decided tonight at 7:25 p.m. that I would start painting and then I had the most brilliant idea...
 
But I'll share that with you tomorrow...Oh you'll love it---I hope!
 
xo
tina

Tuesday, April 1, 2014

Vintage Secretary Re-DO

Let me start this by saying that at my last craft show I had this old vintage quilt rack - the kind that stands up, the one that you can hang several blankets on. I had it for a lot of years and decided one day that I would use it as my wrapping station at my shows. It was perfect for hanging my tissue paper for wrapping my products and for hanging my bags over for putting the wrapped products into. It worked like a dream.
 
Then of course my family packs me up at night and once home we noticed that of all the things that made it home my vintage quilt rack/new wrapping station was not one of them. {super sad face inserted here} boy was I mad...so since then I had been on the look out for a quilt rack or something similar...not an easy task...but I did find something like this here...
 
 
Once I found it I knew it had to be painted so I took my go-to color Turquoise and I think I am in LOVE again.


Isn't she pretty???
 
 
Here is how I plan to use it...

 
The top has this small little tray like thingy - that I suppose could hold spare change or loose buttons but I plan on putting my cards in there.

 
see there is a place for the tissue paper and handles for the bags

 
I think it came out wonderfully - not as good as my original quilt rack


Neat-o
 
I love taking something old and turning it into something cool.
 
I am linking this up to the parties above...
 
Happy Making

Tuesday, January 7, 2014

Hello 2014

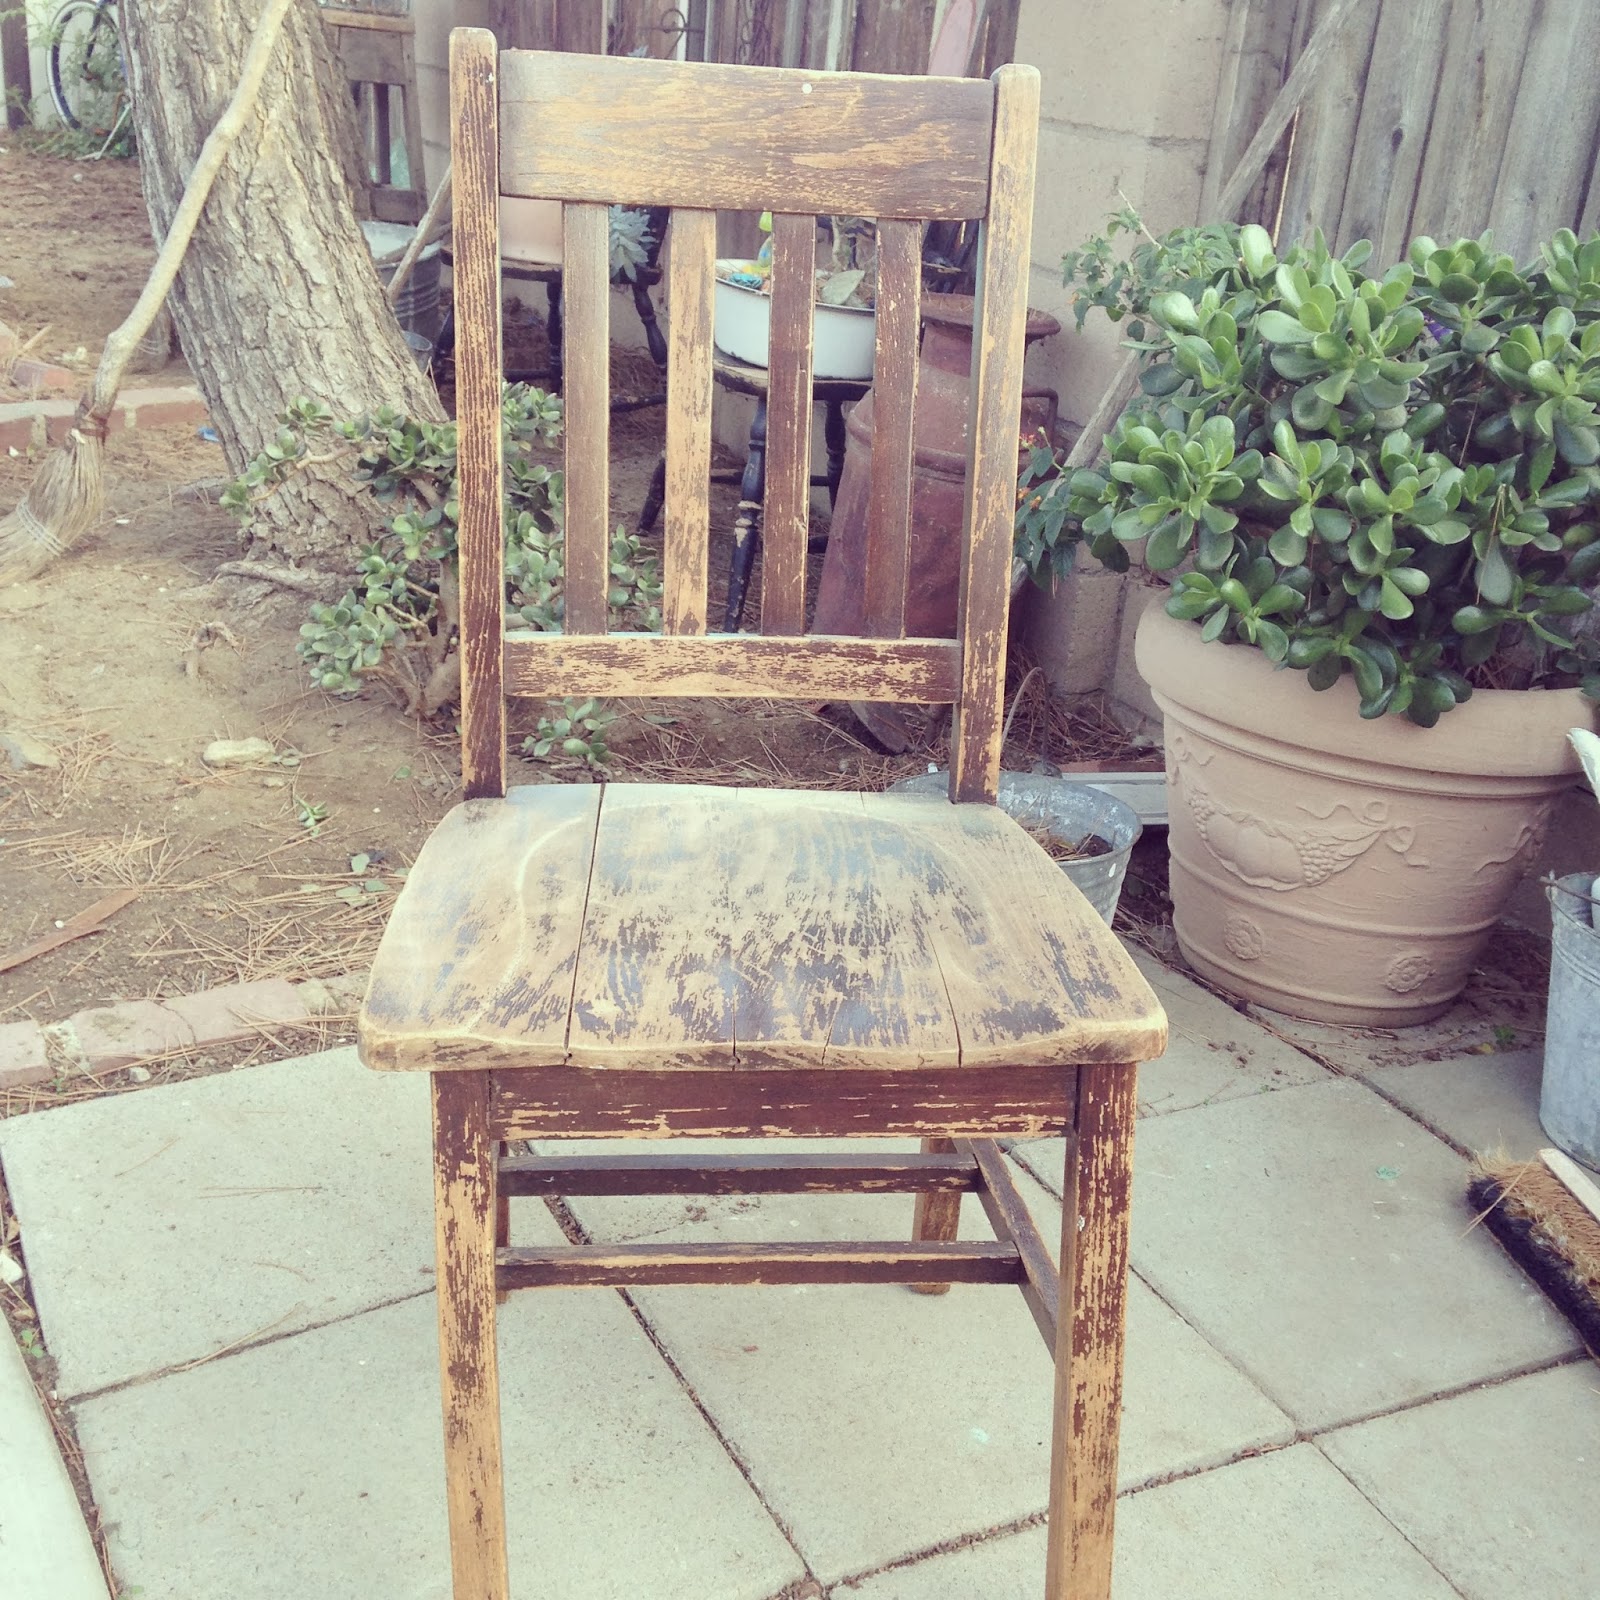
I am starting this New Year with a vengeance. I have projects started all over the place. I am really into refinishing furniture and just finished an amazing vintage chair.

It was really rickety but had great bones...
 
Nice right? Looks like an old school chair.

 
So I spray painted the chair turquoise...I know what? spray paint but I just wanted the base to be a nice bright color - I was planning a distressing bonanza...

 
then I dry brushed some cream paint all over the chair in a half hazard way - I didn't lay it on thick just a quick brush over.

 
Then I took the sander to it and sanded in the MOST wearable spot - like the edges and the seat. When I was done sanding I noticed that the cream paint was still quite bright and wasn't really going for that look so luckily I had some of ANNIE SLOANS dark wax and rubbed it all over the cream paint and it really warmed up the whole chair.

 
Gotta tell you that I am in LOVE with the finished look of this old chair.

 
It sure looks like it has been around awhile!
Challenge - taken & accomplished!

 
pretty cool, right?
 
I am linking this up to the parties posted above.
 
Hope your year is starting out just like you wished!
 
Happy Making


Thursday, December 5, 2013

Making Do

As I posted on my instagram yesterday - I wanted to share a fun project I started one way and finished another.

2 weeks ago I went into a thrift store and found a sweet side table that was nice and sturdy and only 10.00 - the bones were good and I knew it just needed some paint. Fast forward to DIY day...

 
SO... I started sanding and was super excited to get painting when my husband pointed out
that there was a drawer missing...

 
OMG - I didn't even notice that. Great now what - I proceeded painting the table and kept it in my mind wondering what I could do with the small space there - It wouldn't sell with that gap so


we added a dowel and painted it the same color and added a small guest towel and wahh laaa...


A useful table that would work out well in a guest room along with the cute towel...
 
Pure sweetness wouldn't you agree?

 
I love when I make mistakes that actually turn out better then expected.
 
I am linking this up to the parties posted in my tab above.
 
Here's to making "HAPPY" mistakes.